Saturday, December 24, 2016
Sunday, May 29, 2016
Patio Shrimp
Patio Shrimp....spicy, savory and ready in thirty minutes...
The perfect dish after a lazy day by the pool. Fast, easy and a little spicy this is a "go to" recipe around Murph's Kitchen. Originally gleaned from a Junior League of Tucson cookbook, we've refined it over the years and it's mouthwateringly delicious.
Ingredients
2 lbs uncooked shrimp, peeled and deveined
1 Cup Butter
1/4 cup olive oil
1Bay Leaf
1/2 cup fresh squeezed lemon juice
1 Tbsp Lemon Zest
3 Tbsp Capers
1 tsp crushed Red Pepper
3 cloves crushed garlic
1 tsp. cayenne pepper
1/2 cup water
1/2 cup dry white wine
2 tsp. Emeril's Essence
Kosher Salt
Fresh Ground Pepper
Preheat oven to 350 degrees
Combine all ingredients in a saucepan and simmer over low heat for about ten minutes. Don't let it boil!
Arrange shrimp on the bottom of a good size baking dish and cover with sauce.
Bake for twenty minutes uncovered and enjoy the aroma as it tantalizes your senses....
 A great dish on the patio with crusty bread over rice or with pasta...take your pick and enjoy!
Buon Appetito!
 |
| Patio Shrimp over brown rice with a crisp salad |
The perfect dish after a lazy day by the pool. Fast, easy and a little spicy this is a "go to" recipe around Murph's Kitchen. Originally gleaned from a Junior League of Tucson cookbook, we've refined it over the years and it's mouthwateringly delicious.
Ingredients
2 lbs uncooked shrimp, peeled and deveined
1 Cup Butter
1/4 cup olive oil
1Bay Leaf
1/2 cup fresh squeezed lemon juice
1 Tbsp Lemon Zest
3 Tbsp Capers
1 tsp crushed Red Pepper
3 cloves crushed garlic
1 tsp. cayenne pepper
1/2 cup water
1/2 cup dry white wine
2 tsp. Emeril's Essence
Kosher Salt
Fresh Ground Pepper
Preheat oven to 350 degrees
Combine all ingredients in a saucepan and simmer over low heat for about ten minutes. Don't let it boil!
Arrange shrimp on the bottom of a good size baking dish and cover with sauce.
 |
| Swimming in sauce and ready for the oven |
Bake for twenty minutes uncovered and enjoy the aroma as it tantalizes your senses....
 |
| Fresh from the oven and perfectly done |
 A great dish on the patio with crusty bread over rice or with pasta...take your pick and enjoy!
Buon Appetito!
Wednesday, March 26, 2014
Crispy Baked Spicy Fries
 |
| Baked Fries Oozing with Jalapeño Ketchup |
Thickly sliced potato wedges, olive oil and a hefty amount of spice make these one our family favorites. This recipe stands on its own as a savory and crunchy treat but will pair well with burgers, dogs, grilled chicken and almost any grilled protein. We enjoyed lamb burgers alongside the fries that were equally scrumptious.
Ingredients
4 large baking potatoes
4 Tbsp olive oil
Fresh Ground Pepper
1/2 tsp. Szego Hot Paprika
|
1/2 tsp. Garlic Salt
Pinch of Kosher Salt
1/2 tsp. Chili Powder
1/4 tsp. Cayenne Pepper
Directions |
| 1. Preheat oven to 450 degrees. 2. Cut potato into wedges. Mix olive oil, paprika, garlic salt, chili powder and cayenne together. Coat potatoes with oil/spice mixture and place on a baking sheet. | |
| 3. Bake for 30 minutes 4. Remove from oven, turn all "fries" with a set of tongs and return to oven 5. Bake for an additional 15 minutes and serve with your favorite burgers, dogs or whatever makes you smile! Buon Apetito!  |
Sunday, December 1, 2013
Best Ever Turkey Sausage Casserole
 |
Crispy, Creamy, Deliciousness oozing with sweet and savory flavors!This is the best use of leftover turkey you will ever find! Inspiration comes from one of my favorite cookbooks of all time: Marlene Sorosky's Year Round Holiday Cookbook, given to my wife and me in 1983! Over the years we've made nearly every recipe and most are fabulous. Our version of Marlene's recipe has evolved and her book is out of print but I urge you to find a copy and buy it! |
 |
Handwritten notes on the pages of this 1983 Classic |
Turkey Sausage Casserole
Ingredients
1 Pound Italian Sausage (mild or hot are both fine)
1/4 pound butter
3/4 Pound Mushrooms sliced
1 Large Shallot finely minced
4 Tbs all purpose flour
1/2 Cup Riesling Wine
1 1/2 Cups Chicken or Turkey Broth
1/2 Cup Whipping Cream
1 Cup Shredded Sharp Cheddar Cheese
1 Tbs Dijon Mustard
1 tspn Kosher Salt
4 Cups Cooked Turkey cut into bite sized chunks
2 Cups leftover stuffing or one package Stove-Top
Sauté sausage over medium heat and add about a 1/4 cup of water making it easier to break up the meat into bite sized chunks. When done, drain the pan, add to a large mixing bowl where all ingredients will be mixed later.
In a large saucepan melt 4 Tbs. butter add shallots and for sauté a minute. Add mushrooms stirring regularly. When mushrooms are almost done, turn heat to medium high, add Riesling and cook for an additional 3-4 minutes. Reduce heat to medium low and add flour stirring constantly until a roux forms. Add broth and stir constantly until all lumps are gone. Add heavy cream and dijon mustard while continuing to stir and bring to a low boil for one minute.
 |
Lovin' those shallots... |
 |
Mushrooms make this dish mildly addictive... |
Add grated cheese, salt, pepper and turkey mixture to mixing bowl with sausage and toss together.
Pour into a greased 2 quart casserole dish and cover with stuffing mixture. I break up the stuffing with my hands, no other method works better. Sprinkle stuffing over top of casserole and place a few pats of butter over top.
 |
A little butter never hurt anyone. |
Bake uncovered at 350 degrees for 20 minutes.
Yum... goes well with leftover mashed potatoes, gravy, green bean casserole, corn pudding and cranberry sauce.
 |
The Finished Product fresh out of the oven |
Utterly scrumptious, a real crowd pleaser and best consumed over the weekend after Thanksgiving and prior to the Monday dieting routine.
Buon Appetito!
Saturday, June 15, 2013
BBQ Brick Chicken
BBQ BRICK CHICKEN
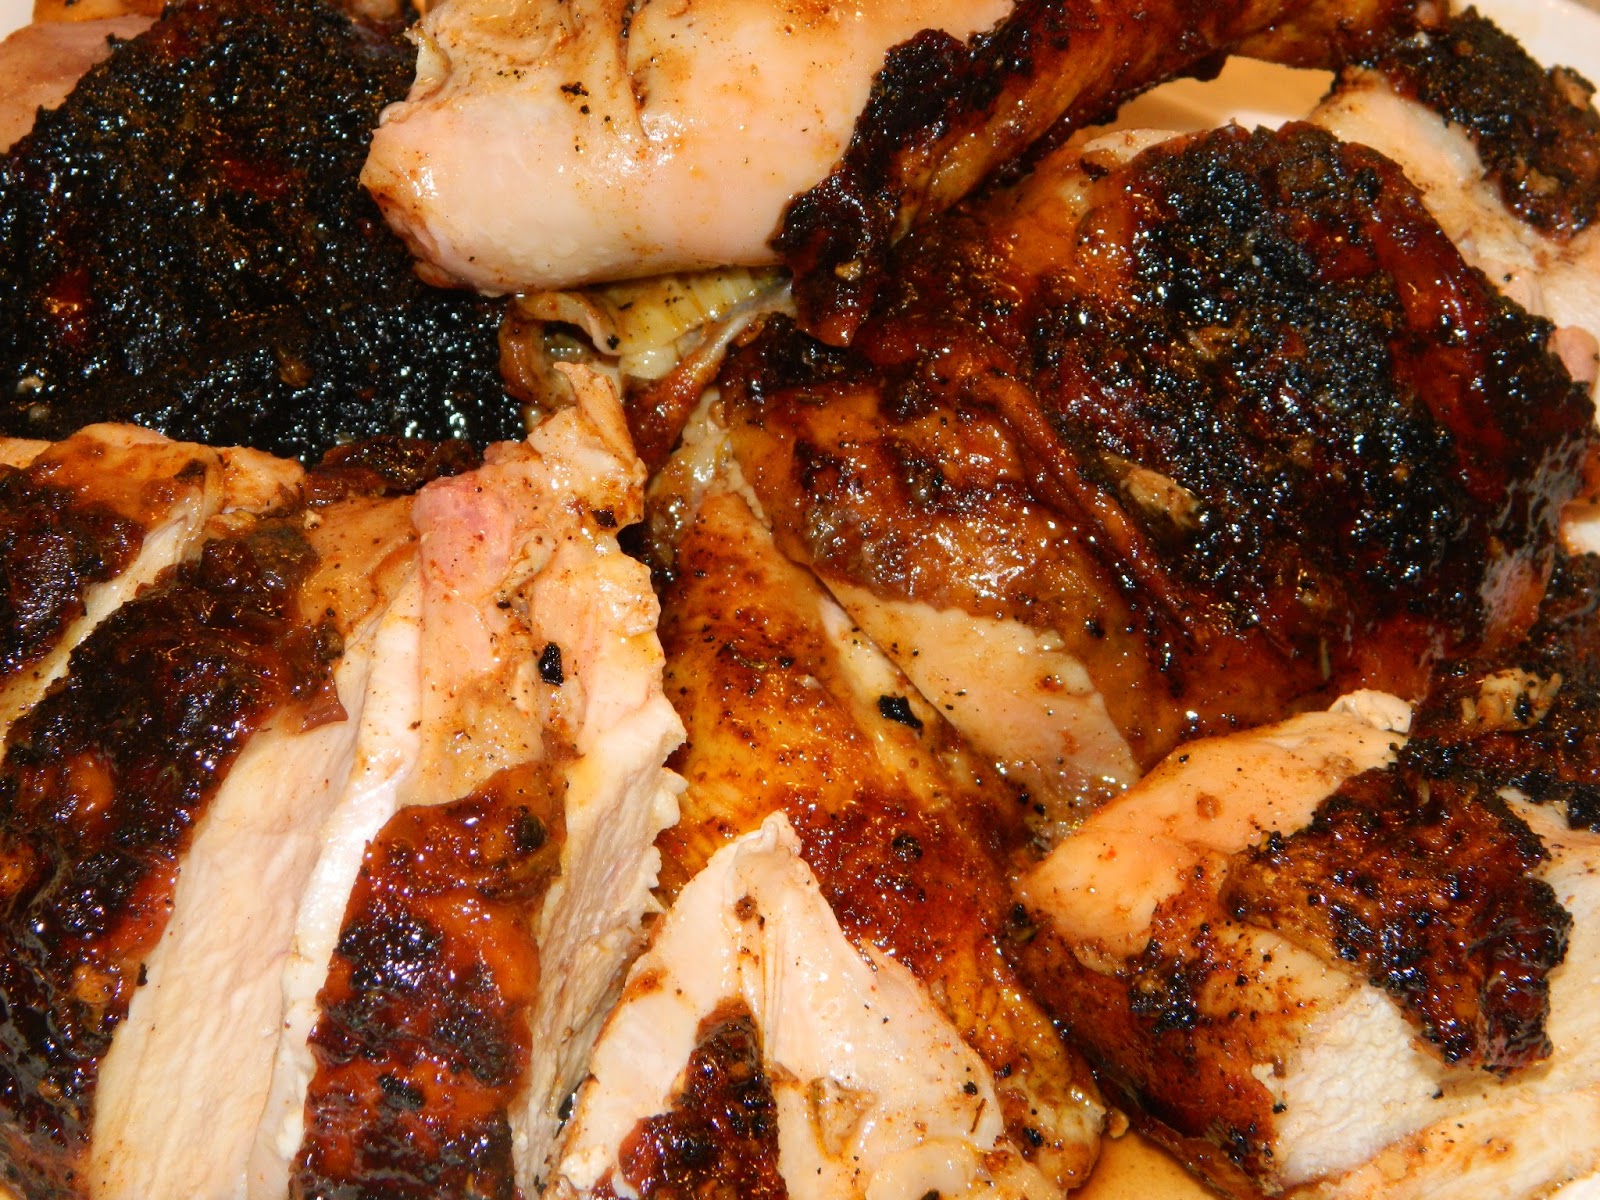 |
| Seriously Tender and Juicy |
Every once in awhile I pick up an idea for a great dish from Guy Fieri. The dude is crazy and wacky but he sure can cook. I watched him make a variation of this on the Today Show and modified it to suit my tastes. I give him full credit for the inspiration and Brick Chicken is now a family favorite.
Ingredients
- For The Brine:
- 1 cup kosher salt
- 1/2 cup sugar
- 3 bay leaves
- 3 cloves garlic, peeled and smashed
- 3 cups ice
- One 5- to 7-pound whole chicken
- For The Sauce:
- 1 cup orange juice
- 4 Tbsp Prickly Pear Jelly
- 1/2 cup light brown sugar
- 2 tablespoons sherry vinegar
- 1/2 cup soy sauce
- 2 teaspoons ground ginger
- For dry rub:
- 2 Tbsp garlic powder
- 2 Tbsp kosher salt
- 3 Tbsp plus Szego Hot Paprika
- 1 Tbsp Cayenne Pepper
- Freshly cracked black pepper
- 1 Tbsp Ground Cumin
- 1 Lemon, juiced
Preparation
Place the whole chicken, breast-side down, on cutting board. Using and electrice knife, serrated knife or kitchen shears, remove the backbone by cutting up from the tailbone to the neck on both sides.

For the brine:
To a small saucepan, add 1 cup water, the salt, sugar, bay leaves and garlic cloves. Bring to a simmer to dissolve the salt and sugar. Once at a simmer, turn off the heat and add the ice. Once the liquid is cool, place into a resealable bag over a bowl and add the chicken to the brine, making sure it is completely submersed. Allow to brine in the fridge for at least an 60 mimutes but preferably several hours
Make the sauce:
In a small pot over medium-low heat, combine orange juice, prickly pear jelly, soy sauce and sherry vinegar. When liquid simmers, whisk in the brown sugar and ginger. Simmer until it begins to thicken, about 5 minutes or so. Remove from the heat and let stand .
Needless to say, I like locally sourced ingredients and this is really good prickly pear jelly!

Needless to say, I like locally sourced ingredients and this is really good prickly pear jelly!

Preheat grill to medium
Rub the bird:
Remove the chicken from the brine and pat dry. Thoroughly mix herbs together in a small bowl and coat the chicken with the dry rub, making sure to sprinkle the bird liberally inside and out.


Hit The Grill:
Place chicken, breast side down first, for 7 to 8 minutes on a hot grill. Place a heavy weight (like a foil-wrapped brick) on top and press down firmly to flatten the chicken. Turn once and continue to grill, bone-side down for another 15 minutes. Reduce heat to medium as it cooks if it starts to burn - this will allow the chicken to cook through.

Squeeze the lemon juice over the chicken as it cooks and the skin gets browned and crispy. Remove brick and with a silicone pastry brush, glaze the chicken with the Cactus Jelly Sauce during the last 5 minutes. The chicken is doen when an instant-read thermometer tucked under the breast will read 165 degrees. Allow the chicken to rest for 6 to 8 minutes.
Carve and Serve:
Carve the chicken into breasts, thighs and wings. Arrange on a large serving dish alongside the sauce.
Buon Appetito!!
Buon Appetito!!
Sunday, June 9, 2013
Homemade Salsa Fresca
Homemade Salsa Fresca
Like so many recipes in our family, this one is named after the person who brought it to us and in this case it was our youngest, Tara. We celebrate Cinco de Mayo here in Tucson and all of our kids came home from school with a Mexican food recipe. This was an instant hit and if you've got a few sharp knives, it only takes about 20 minutes to prepare. It is best left in the frig for a few hours to let the flavors meld together but can be eaten within minutes. We make this all summer long and enjoy with fresh chips or on top of our favorite mexican specialties. This salsa goes really well on top of a couple of fried eggs on Sunday morning or atop some freshly grilled fish later in the week!
Fresh Ingredients Are the Key!


Tara's Homemade Salsa Fresca
Directions
This keeps in the frig for a day or two and makes a great addition to a batch of guacamole.
 |
| Salsa Fresca! |
Fresh Ingredients Are the Key!


Tara's Homemade Salsa Fresca
Ingredients
5 Tomatoes, Roughly Chopped
2 Jalapeños, Seeded and Finely Chopped
3 Cloves Pressed Garlic
2 Fresh Squeezed Limes
1/3 Cup Finely Chopped Onion
1/2 Cup Finely Chopped Fresh Cilantro
Fresh Ground Pepper
1/2 tsp salt
1/4 tsp garlic salt
3 Cloves Pressed Garlic
2 Fresh Squeezed Limes
1/3 Cup Finely Chopped Onion
1/2 Cup Finely Chopped Fresh Cilantro
Fresh Ground Pepper
1/2 tsp salt
1/4 tsp garlic salt
Directions
Combine all ingredients in a glass mixing bowl and stir well. Place in the Frig for at least one hour.
Prior to serving it's a good idea to do a final taste and adjust seasonings.
Occasionally, I will cut an avocado into bite sized chunks and toss it in a small bowl for a delicious twist with a bit more gusto!

Serve with your favorite chips and and enjoy!
Prior to serving it's a good idea to do a final taste and adjust seasonings.
Occasionally, I will cut an avocado into bite sized chunks and toss it in a small bowl for a delicious twist with a bit more gusto!

Serve with your favorite chips and and enjoy!
This keeps in the frig for a day or two and makes a great addition to a batch of guacamole.
Taracita
 |
| The Princess in her younger days.... |
Sunday, May 26, 2013
Roasted Cherry Tomatoes and Ricotta Appetizer
Quick Update: Allow me to apologize for my hiatus and thank all of you who have bugged me to the point that I am now getting back into the groove. We are having a "Promotion Party" for our youngest daughter tonight and will be serving one of our family favorite appetizer trays built around roasted tomatoes and ricotta cheese served beside olives, salami and whatever else happens to be in the frig.
Roasted Tomatoes
Ingredients
2 Pints Cherry or Grape Tomatoes
Splash of Good Olive Oil
Big Pinch of Kosher Salt
1/2 tspn Red Pepper Flakes
Fresh Ground Pepper
One Tspn Dried Oregano
Preheat Oven to 450 degrees
Place the tomatoes in a large mixing bowl and hit them with a good splash of olive oil.
Sprinkle a pinch or two of kosher salt and grind a good amount of black pepper on top
Add the red pepper flakes
Finish with Oregano and toss well in the bowl.
Transfer to a baking sheet and place in the oven for about 20-30 minutes--Keep an eye on them and begin checking at the 15 minute mark.
Tomatoes need to "pop" and crisp up a bit for this dish to taste really good
When tomatoes are done, remove from oven and let them sit for a few minutes
Remove from the baking sheet with a spatula and place in a bowl
Mash well with the back of a spoon and place tomatoes in the center of a large serving tray.
Ricotta Spread
Ingredients
One 15 oz. Container of Ricotta Cheese
Two Tbsb Finely Chopped Pine Nuts
1/4 Cup Finely Chopped Fresh Basil
Splash of Olive Oil
Kosher Salt to Tast
Place the ricotta in a food processer along with the chopped basil and finely chopped pine nuts and about 1/4 tspn of kosher salt. Place lid on processer and turn on low while drizzling in olive oil until the blade is moving well and the spread reaches a smooth and creamy texture.
Create your Antipasto Tray
Usually we create a tray with the roasted tomatoes in the center ringed by the ricotta cheese and then add a ring of good salami and on this day we added a ring of thinly sliced cucumber as well. It's a good idea to have some pita chips on the side or a bit of roasted italian bread. For those heading down the low carb road, the cucumbers serve as a healthier chip substitute.
This is truly a scrumptious summer dish and a staple at our house, especially when we are entertaining guests. If there are any leftovers they combine well and serve as a great spread on crackers or bread.
Buon Appetito!
Roasted Tomatoes
Ingredients
2 Pints Cherry or Grape Tomatoes
Splash of Good Olive Oil
Big Pinch of Kosher Salt
1/2 tspn Red Pepper Flakes
Fresh Ground Pepper
One Tspn Dried Oregano
Preheat Oven to 450 degrees
Place the tomatoes in a large mixing bowl and hit them with a good splash of olive oil.
Sprinkle a pinch or two of kosher salt and grind a good amount of black pepper on top
Add the red pepper flakes
Finish with Oregano and toss well in the bowl.
Transfer to a baking sheet and place in the oven for about 20-30 minutes--Keep an eye on them and begin checking at the 15 minute mark.
Tomatoes need to "pop" and crisp up a bit for this dish to taste really good
When tomatoes are done, remove from oven and let them sit for a few minutes
Remove from the baking sheet with a spatula and place in a bowl
Mash well with the back of a spoon and place tomatoes in the center of a large serving tray.
Ricotta Spread
Ingredients
One 15 oz. Container of Ricotta Cheese
Two Tbsb Finely Chopped Pine Nuts
1/4 Cup Finely Chopped Fresh Basil
Splash of Olive Oil
Kosher Salt to Tast
Place the ricotta in a food processer along with the chopped basil and finely chopped pine nuts and about 1/4 tspn of kosher salt. Place lid on processer and turn on low while drizzling in olive oil until the blade is moving well and the spread reaches a smooth and creamy texture.
Create your Antipasto Tray
 |
| Roasted Tomatoes & Ricotta Spread with Salami and Cucumbers |
This is truly a scrumptious summer dish and a staple at our house, especially when we are entertaining guests. If there are any leftovers they combine well and serve as a great spread on crackers or bread.
Buon Appetito!
Monday, December 17, 2012
Flo's Beef Barley Soup
 |
Mom's Barley Soup |
Ingredients
- 2 tablespoon good olive oil
- 2 big marrow bones or what is now called- "beef oxtails"
- Kosher salt and freshly ground black pepper
- 2 medium chopped onions
- 5 carrots sliced in 3/8' or so rounds
- 5 stalks celery sliced in 1/4" pieces
- 1 Small can Tomato Sauce
- 2 pounds of Chuck Steak trimmed and cut in small bite sized pieces
- 1 Package Knorr Spring Vegetables
- 1 cup pearled barley
Directions
Heat the olive oil in a large pot like a Le Creuset. Add the oxtails/marrow bones along with a generous amount of salt and pepper.
 Cook over medium-high heat, stirring occasionally,
for 10 minutes until browned all over. Remove the oxtails with tongs and set aside in a big bowl.
Cook over medium-high heat, stirring occasionally,
for 10 minutes until browned all over. Remove the oxtails with tongs and set aside in a big bowl.
Add the onions, carrots and celery, to the oil in the
pot and cook over medium heat, stirring occasionally, for about 10 minutes.

medium high heat for 5 minutes or so; make sure no red left in the meat. Return the oxtails to the pot, add 1 teaspoon each of of salt and pepper. Add one small can of tomato sauce
 Add enough water to about 1 1/2" below top of pot Add one package of the Knorr Spring Vegetables Bring to a boil. Lower heat, cover,
and simmer for 1 hour or longer if you have time. Longer is never bad.
Add enough water to about 1 1/2" below top of pot Add one package of the Knorr Spring Vegetables Bring to a boil. Lower heat, cover,
and simmer for 1 hour or longer if you have time. Longer is never bad.Taste soup, adjust seasonings, add barley, cover and cook for an additional 30-45 minutes. When soup is done, remove the marrow bones and serve on a plate with a good crusty bread. Dig your knife down into the bone, spread the absolutely scrumptious and somewhat decadent marrow generously and enjoy!

Buon Apetito!
Murph
Wednesday, July 18, 2012
Wacky Chocolate Cake
Wacky Chocolate Cake with Butter-cream Icing
 |
| The Original Recipe in Cherie's Writing on an Index Card |
This is the best chocolate cake recipe on the planet, period end of story.
Cherie's grandma is credited with introducing this recipe into the family many decades ago and it is the first recipe Cherie made. The recipe doubles easily and makes one cake or 12 cupcakes.
If you've never had the luxury of enjoying a Wacky Chocolate Cake, do not pass go and do not stop until you locate these easy to find ingredients and make one. This is the definitive cake for entertaining because it's easy to make and almost foolproof.
I've decided to include pictures of both the cake and the cupcakes just to show how simple and remarkably delicious this recipe truly is.
The cupcakes were made by Tara and Cherie for a school party and we appropriately decorated.
 |
| A Wacky Cupcake |
The cake was for a birthday celebration for our friends Hank and Joe who have birthdays close together.
 |
| Two Pigs in a Pod above the Wacky Cake |
Have fun making this with your family and get creative with icing colors and other decorations. We've run the gamut from black and orange for Halloween to a pale blue ocean color with the Little Mermaid swimming on top. As Emeril would say " it's a food of love" and that's certainly true for this recipe.
Wacky Chocolate Cake
Ingredients
1 1/2 Cups Flour
3 Tbsp Cocoa Powder
6 Tbsp. Vegetable Oil
1 Tbsp Cider Vinegar
1 Cup Sugar
1 tspn Baking Soda
1/2 tsp Salt
1 Cup Water
Preheat oven to 350
Combine all dry ingredients in a mixing bowl and stir until blended.
Mix all the wet ingredients in a separate bowl and blend well
Pour all wet ingredients on top of dry ingredients and blend well with a spoon or your favorite spatula
Pour all ingredients into a non-greased baking dish or pan. 9 x13 will work but we prefer a bit deeper pan that's actually 9 1/2" x 9 1/2" which makes a taller moister cake.
Bake at 350 for 25 minutes.
Just to be sure, insert a wooden toothpick into the center of the cake and if it comes out clean your cake is done, if it seems to be too moist, bake for an additional 5 minutes.
As I always point out; baking is altitude dependent and we live at 2500 feet above sea level. Your actual cooking time will vary according to your altitude.
Remove cake from oven when done and allow to cool completely- about an hour or so.
When your cake is cooled you can move on to the icing...
Note from Cherie: "I truly just throw this icing together...it's blending of all the ingredients and the key is mixing with an electric beater until it looks right and has a smooth consistency."
Ingredients for Icing
2 cups (roughly) powdered sugar
1/4 cup of softened butter - not margarine!
1/2 tsp. vanilla
a1/4 cup of half and half or milk
Food Coloring if desired
Add sugar, butter and vanilla in a mixing bowl and add the milk a little at a time while mixing until the consistency is just right. It usually ends up being around 1/4 of a cup, but it at times more. Humidity can play a role. If it's too thick, add a little more milk, too thin - add more powdered sugar.
After the icing is just the thickness that you like, add food coloring. The icing should be very creamy white, which is nice, but adding color is fun! We love the Wilton Brand of Food Colors because they are so vibrant.
 |
| The Birthday Boys- Hank and Joe Happy Wacky Eating!!! |
Thursday, July 12, 2012
Linguini with Clam Sauce

If you've been reading this blog for awhile you know that I regard recipes as guidelines, not formal steps that must be followed. I experiment a lot and so should you and neither of us should be afraid to fail on occasion. My worst ever was when I tried to make an omelette from left-over spaghetti and marinara sauce. It was a disaster and turned into over easy eggs and toast as the back up plan. To that end, this is my personalized version of linguini with clam sauce. Specifically I like to add lemon zest, roughly chopped tomatoes and a bit of crushed red pepper and white wine in lieu of clam juice. Are they mandatory? Of course not., so feel free to fine tune to your personal preference and email me if you make a discovery that must be shared.
Trust your instincts, buy local whenever possible and have a deep spice collection to help fill in the gaps while creating fun variations on your original theme.
Today I went to the local Oriental market and picked up clams for around $5 per pound.
I find "out of the way' markets can be fantastic and use Yelp and Google Places to find local info.
Tips and Comments
 |
| All Ingredients Staged and Ready to Go! |
*Staging all your ingredients is a must for this fast moving dish
*Thinly slicing garlic and shallots prevents them from becoming bitter
*Buy a garlic peeler (it's a little silicone tube) if you don't already own one; they are fantastic.
* Add a good handful of salt to your pasta water, Americans tend to add far too little.
* A big stainless saute pan is a must for this dish and many others.
Ingredients
1/3 cup extravirgin olive oil
1 shallot thinly sliced
5 garlic cloves, thinly sliced
One Lemon, juiced and zested
1 teaspoon dried hot red pepper flakes ( more you like it spicy)
1/3 cup dry white wine
1 lb linguine
2 lbs. small clams
2 TBSP butter, cut into small pieces
2 Ripe Tomatoes, rough chopped
1/2 cup chopped fresh flatleaf parsley
Directions
Begin by bringing a large pasta pot to a boil and remember to add a good handful of salt
Heat oil in a a large saute pan over moderately high heat until hot but not smoking
Sauté shallots and garlic stirring frequently for about 3-4 minutes.
Add red pepper flakes and cook, and additional 2 minutes.
Add Pasta to the boiling water and allow to cook for 4-6 minutes
Drain pasta and save about 2 cups of the starchy for your clam sauce. It's ok to hold the pasta in your colander for a bit until you add it back to the saute pan with the clams and sauce.
To your saute pan, stir in wine and clams and about 1/2 cup of your pasta water, you can always add more pasta water later but this is one of the big keys to a great sauce.
 |
| Just getting started |
Add lemon juice, zest and tomatoes and half the chopped parsley, stir and cover.
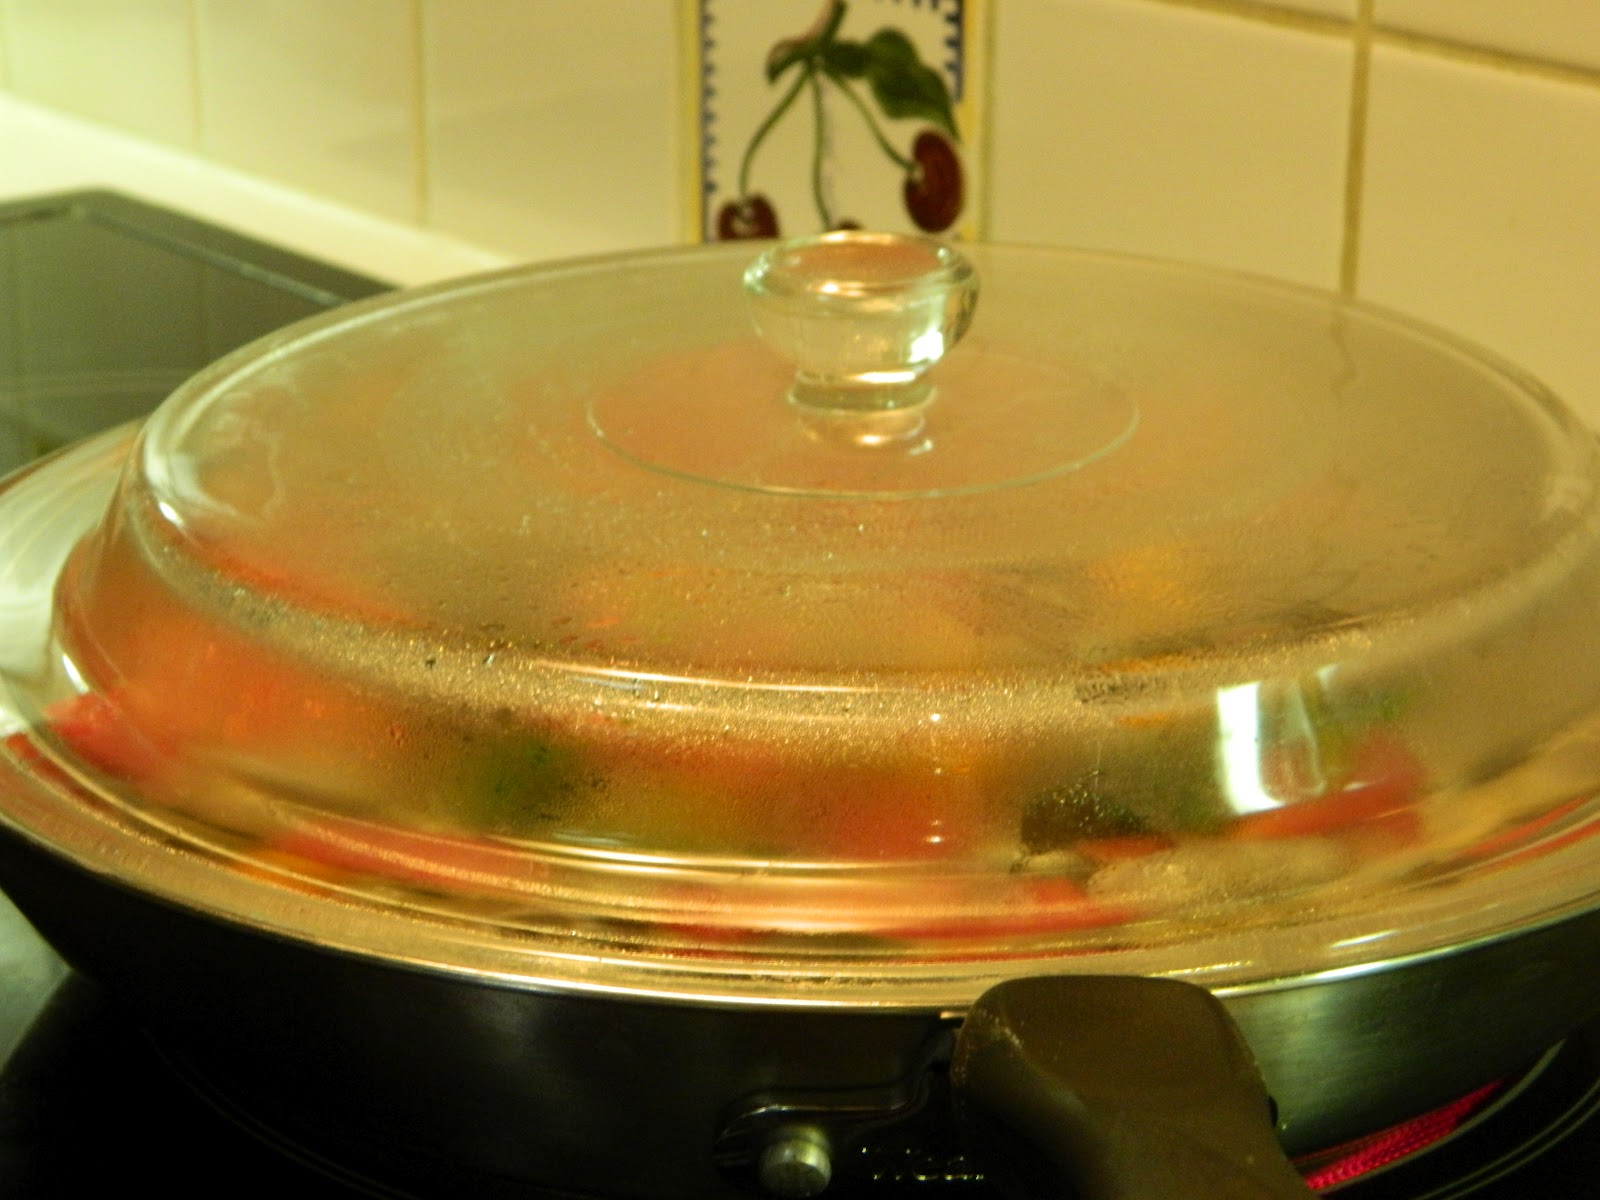 |
| A glass lid comes in handy |
When the last clam opens, add the linguine, chopped parsley and a bit more or the reserved pasta water if desired.
Finally, remove from heat and add your the two pats of butter, remaining parsley tossing gently until the sauce, butter and pasta are glimmering.
 |
| Starting to look really good |
I serve freshly grated Parmesan and a bowl of red pepper flakes on the side.
 |
| BUON APPETITO! |
Saturday, July 7, 2012
Mexican Pasta Salad with Green Chiles

Pasta Salad with Green Chiles
Ingredients
 |
| Our Favorite Brand of Cotija Cheese |
2 Cups diced fresh Tomatoes
2 Anaheim Chiles, roasted, peeled and diced
1 Pasilla Chile, roasted, peeled and diced (prepare in advance or dice one cup of whole canned green chili's in a pinch)
1/4 Finely chopped Red Onion
2 Tbsp Red Wine Vinegar
1 stick Butter melted
1 Cup Crumbled Cotija Cheese
1/2 lb. grated yellow cheese
Cherry Tomates
Sea Salt and Freshly Ground Pepper
Directions
Cook noodles to al dente and set aside
Place diced tomatoes and chiles in a large bowl and sprinkle with vinegar
Cover diced onion with water and sprinkle with vinegar
Roast chiles, peel and dice- Tip slightly warm chili's give this salad a great flavor!
Just prior to serving, melt butter in a good sized pan and add pasta coating evenly then transfer to a large bowl.
Sprinkle one third of the grated cheese over the noodles and layer half the tomatoes, chiles and onions (minus the water).
Generously season with salt and pepper, and toss well prior to serving!
 |
| Monsoons Moving In! |
The basis for this recipe was published in the now defunct, Tucson Citizen newspaper by Alva Torres who wrote a Mexican food column for many years. We modify every recipe over time but I acknowledge Alva for the great family dishes she shared with her readers. This basic recipe was originally published in July of 1990 and called "Mama Bella Salad." Thank you Alva, you have made quite a few us happy over the years by sharing your special dishes.
Saturday, May 26, 2012
Greek Chicken
Greek Chicken and Artichokes on the Grill
 |
| Chicken and Artichokes with lots of lemon and garlic |
I am going to make artichokes and start them out my normal way in a recipe posted previously but tonight I will finish them on the grill with a bit of the chicken marinade. Grilled artichokes are a family favorite and after boiling you simply remove the choke, brush with a litlle olive oil and garlic and voila! You end up with a slightly smokey version of the original packed with flavor. Greek Chicken is one of those recipes that is nearly fail safe. In the middle of winter I will make it from start to finish in the oven covered for about 45 minutes at 325 and uncovered for another 30-45 minutes at 350 degrees. The best way determine if chicken is done is by observing when it pulls away from the bone. The alternative is to insert an instant read thermometer into the thickest part of the chicken and look for a reading of 160 degrees.
Greek Chicken
Marinade Ingredients
3/4 Cup Olive Oil
4 Lemons, 3 Zested and Juiced and one quartered
3/4 Cup dry White Wine
1 tspn Sea Salt
1/2 tspn White Pepper
1/4 cup chopped fresh Rosemary
1 Tbsp Dried Oregano
8-10 Cloves Pressed Garlic
1 Whole Chicken cut up plus whatever it takes to feed everyone!
Make marinade early in the day by adding all the ingredients to a large mixing bowl whisking to combine well. Depending on how much chicken you have, either place it all in a gallon ziploc bag or spread it out in a large baking dish. Marinade for at least 8 hours and turn every couple of hours to ensure proper coverage.
Take you bag of chicken out of the frig at least one hour prior to cooking allowing it to reach room temperature. Cold chicken tends to burn on the outside and takes much longer to cook. Place the chicken in a large baking pan and grab your favorite basting brush prior to heading outside.
 |
| Ready for the Grill! |

As mentioned above you'll have to refer to another post in Murph's Kitchen to grab my artichoke recipe. If you choose to make both the artichokes and the chicken, place the chokes on the grill at about the 45 minute mark. I use the same marinade on the chokes right after I place them on the grill and brush both sides only once. After they are a bit charred, remove to the same platter you will use to serve the chicken. The combo of the chicken and the chokes makes for a very appealing presentation.
I like to serve rice or roasted red potatoes with this and it also goes well with a simple salad covered with the Creamy Lemon Salad dressing you can find in a prior post.
 |
| The Aroma is incredible and the flavors are remarkable! |
Buon Appetito!
Subscribe to:
Posts (Atom)